A general overview of a recent project to make a set of CNC cut and engraved instrumentation panels for use on sailboats.
To start with, the cutting itself was on my own equipment so I am not going to go into detailed machine settings; we’ll keep it on topics that can be applied to any CNC job using the AMT machines.
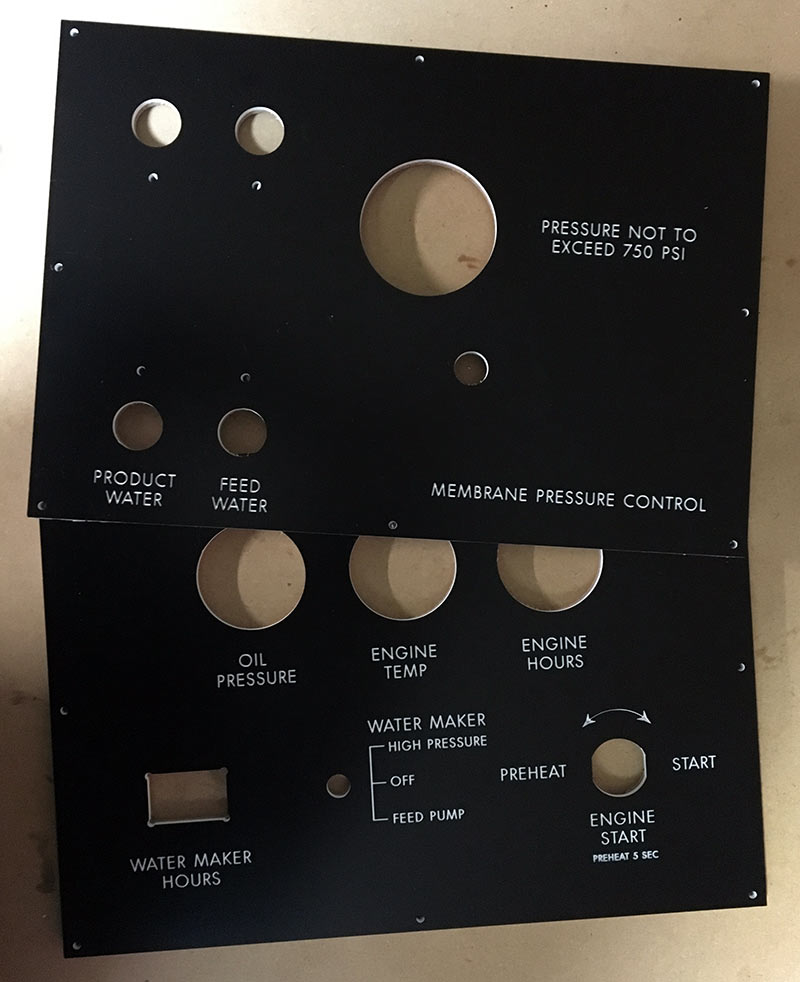
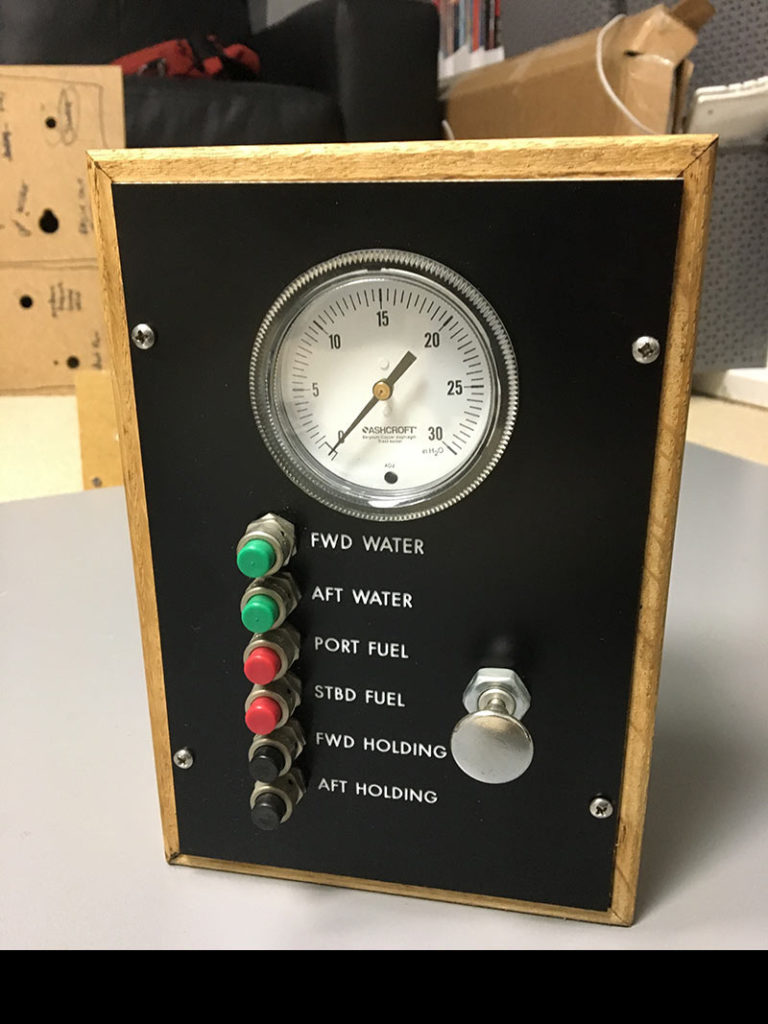
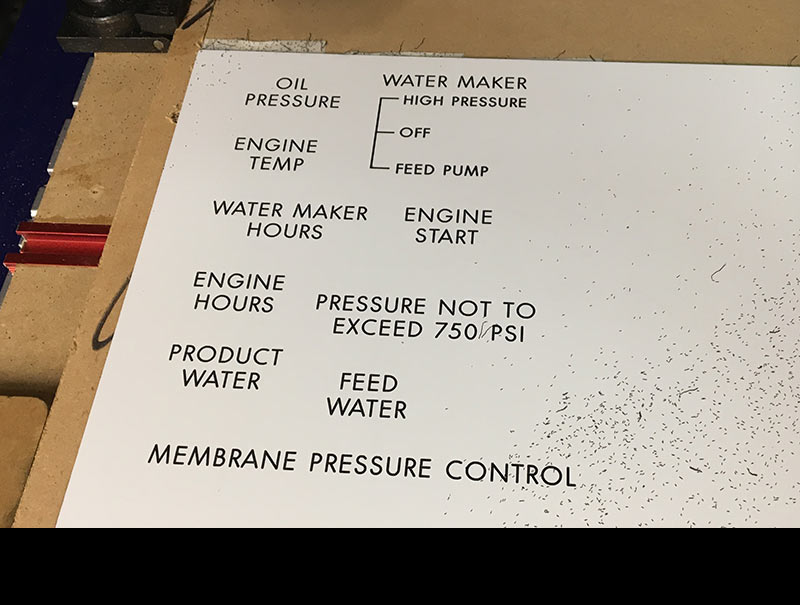
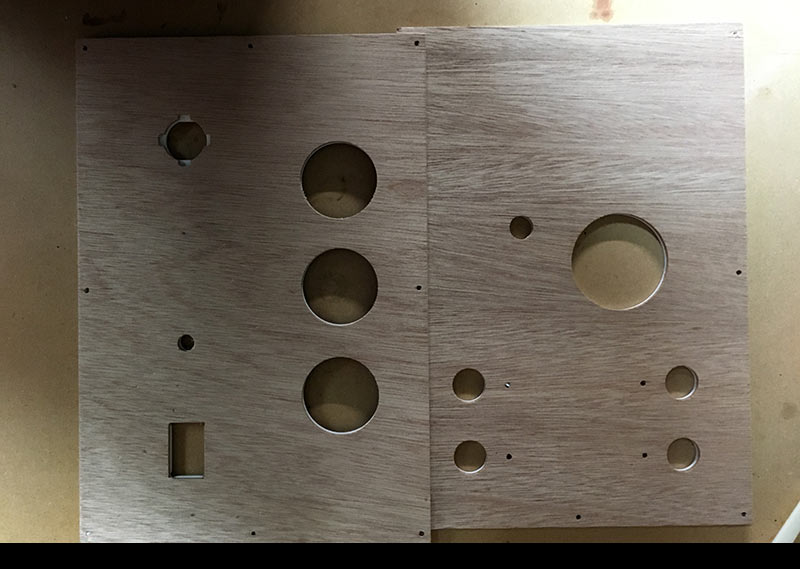
Overall the project was ten instrument panels revolving around the water maker(desalinator) and storage tank levels on several sail boats; all had similar components but with slightly different layouts. I decided to use two toned plastic because I had used it before and found the material easy to mill and available in many different color combinations. I used Adobe Illustrator to layout the design files.
Materials Used

Rowmark Two Tone Plastic:
You can buy Rowmark and similar signage plastic online at: johnsonplastics.com (Concord, CA if you want to go pick it up) or
delviesplastics.com (Salt Lake City, UT)
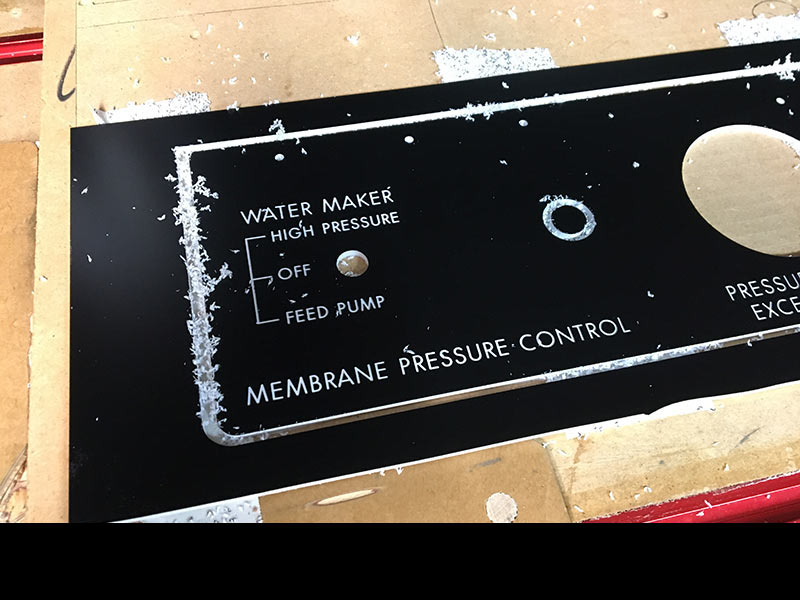
Two types of plastic were used: 1/8″ thick black with white core and a 1/32″ white on black core sheet for thinner labels on an existing panel.
Note: You can also buy laserable versions of materials like Rowmark; so using our laser cutter is also an option for this type of project!
Marine grade plywood:
From local MacBeath (Berkeley & AMT supporter) this ply backed most of the larger panels for added stiffness, rowmark is not a terribly rigid material. The wood was later sealed on the back.
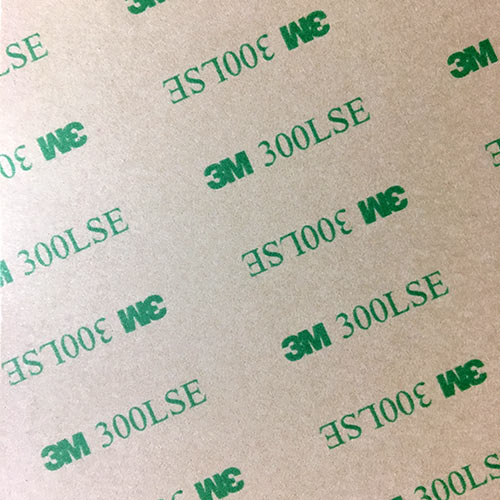
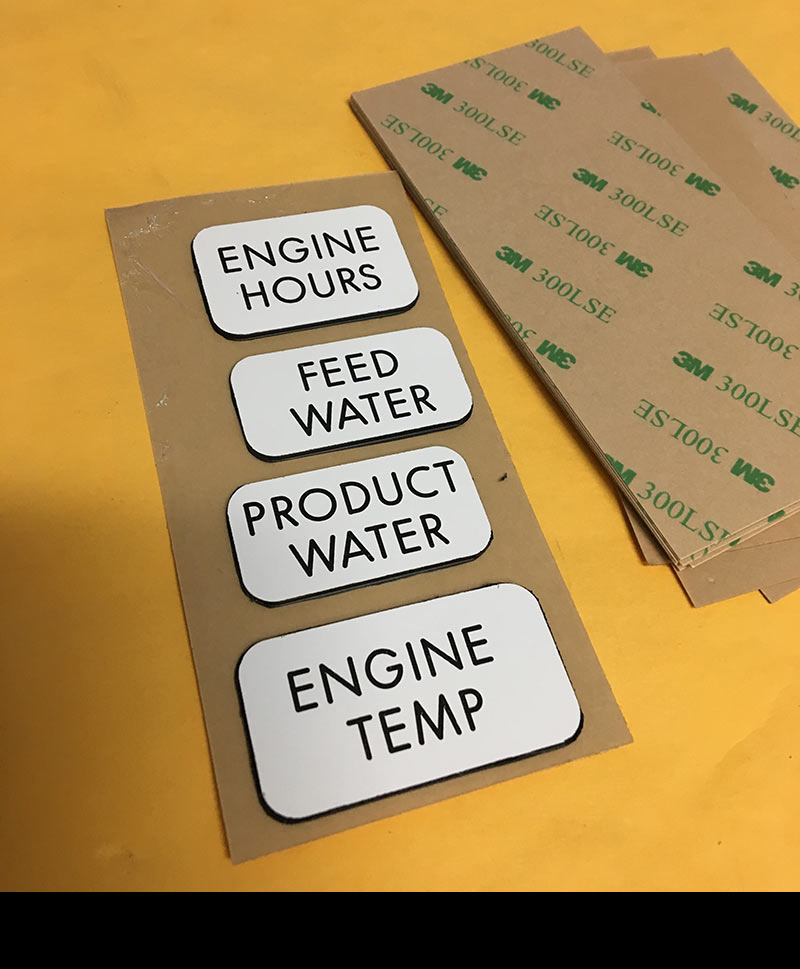
3M double sided adhesive: Ebay is a good place for this stuff, you can find people selling waste cutoffs of larger sheets at a reasonable price. Search for 300LSE. Depending where you look the markup is crazy for just a couple pieces!
The 3M tape is used to bond the plastic face to the wood backer. Like most high bond tape, once you apply pressure it’s not going anywhere.
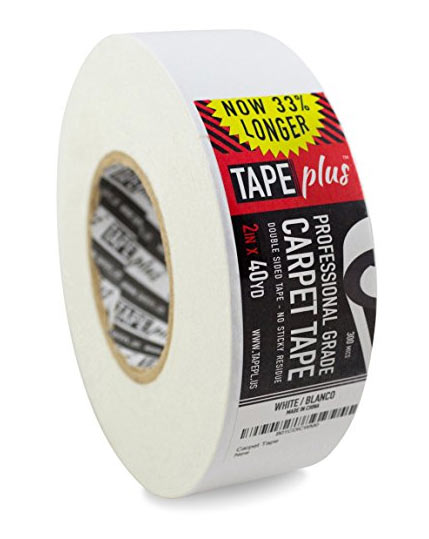
Double sided carpet tape: Used to hold down the thin plastic on the waste board while it’s being cut on a CNC. I bought mine on amazon, the brand was TapePlus. As a bonus you can get away without tabbing your parts if you have enough tape underneath the pieces. For the most part it pulled up cleanly and didn’t leave a sticky mess.
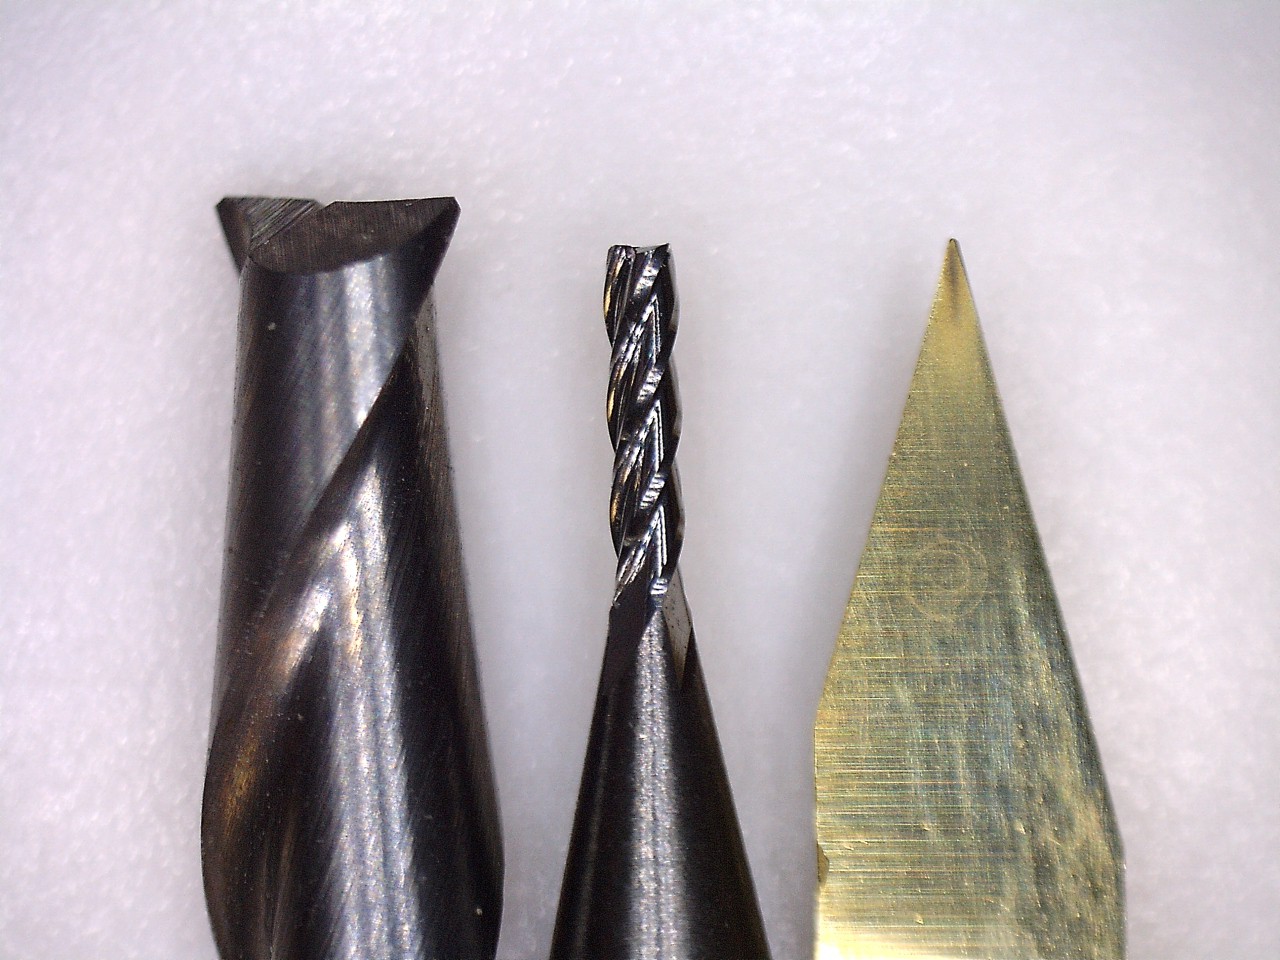
Engraving Bits: Most of the text was cut using a small 1/32″ Cutting Diameter 4 flute end mill 1/8″ shank (middle pic). Some other elements using various 1/8″ shank engraving bits. Both the plastic and the plywood
were cut out with generic 1/8″ cutting dia., two flute spiral endmill (left pic).
Design and File Setup
Few things to touch on:

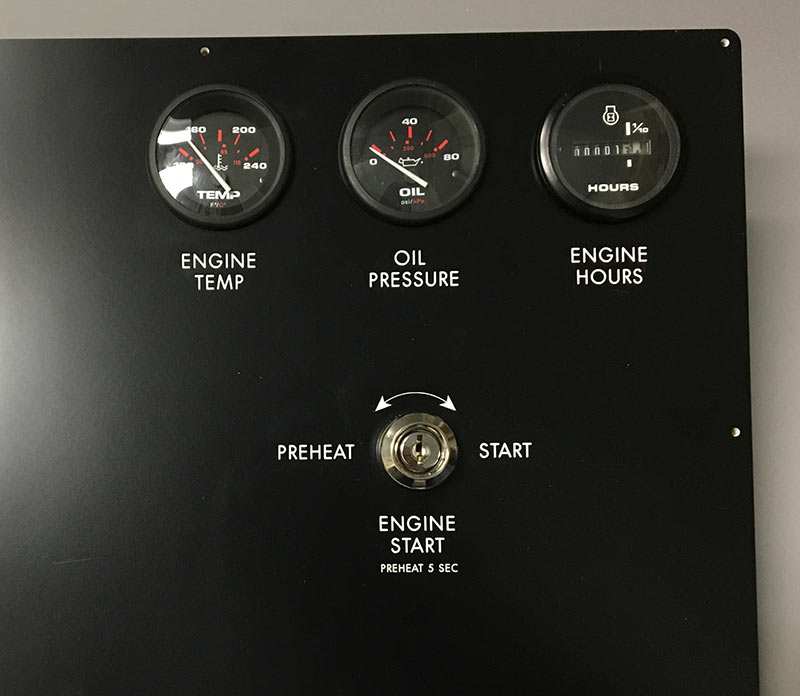
Doing a rough layout is helpful before cutting into the more expensive materials. Inexpensive hardboard or scrap cardboard can be used to double check placement. This limits surprises like not having clearance on the back for wiring/plumbing. Also determine screw placement for final mounting and how much material thickness you can have and still tighten down the instruments securely.

Single line fonts: If you want to cut small lettering on either a CNC or laser cutter take some time and read up on single line fonts/engraver fonts, if you aren’t already familiar with them.
Hershey text an inkscape extension (now included in Inkscape but some good info on this page)
http://imajeenyus.com/computer/20150110_single_line_fonts/index.shtml (good list of single line fonts you can download)
http://www.mrrace.com/CamBam_Fonts/ (another font set to try)
I find you sometimes have to clean these fonts up in Illustrator with the pathfinder outline tool, doing so you can get the CNC to not double back and once optimized, reduce the overall cut time.
Cutting:
On the two color plastic you can go in .02″ and clear the top layer, there’s bit of thickness variation so it helps to have a leveled wasteboard/spoil board. For this project I attached a scrap piece of 3/4″ mdf on top of my existing work surface and ran a leveling pass, you can take a marker and scribble over the area so you know when you’ve gotten all the low points.
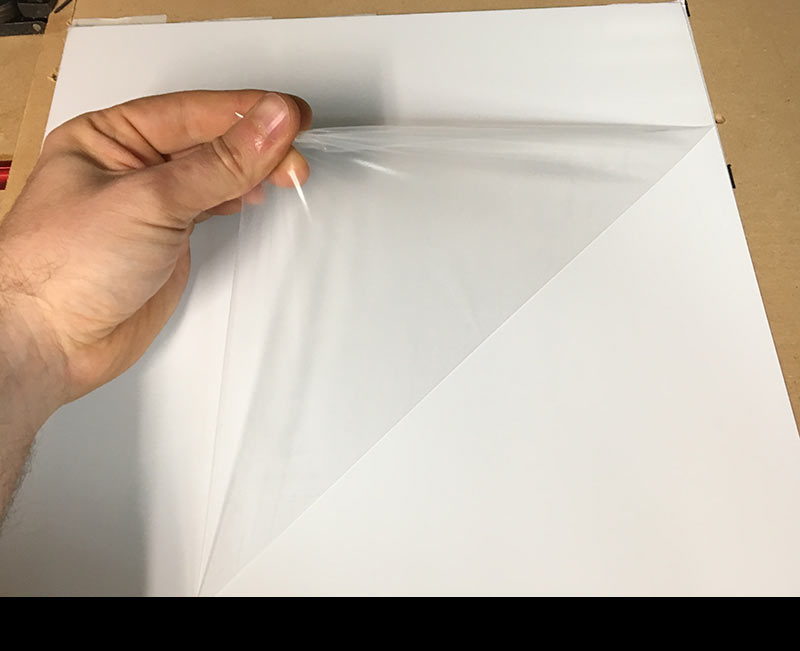
Rowmark and materials like it ship with a clear protective film, similar to extruded acrylic. You’ll get better results on your engraving if you remove it before hand.
Assembly:
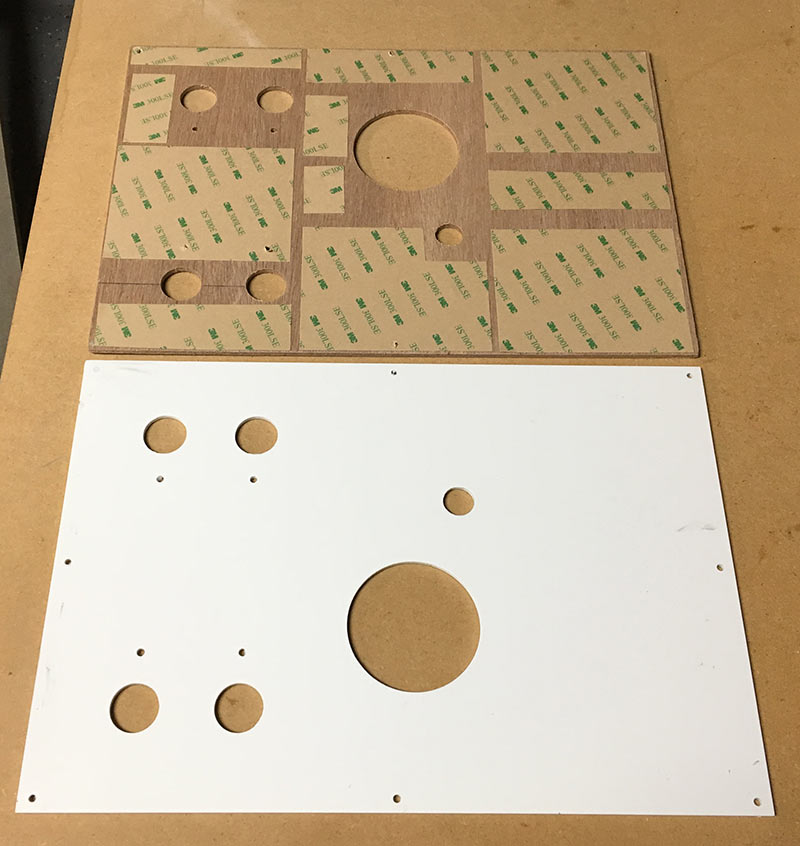
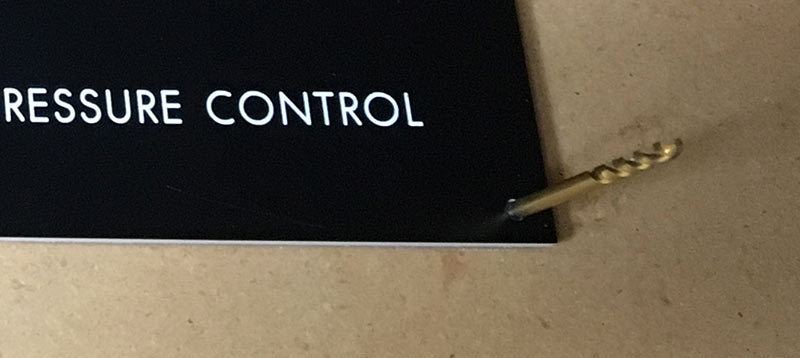
Clean both sides to be taped, making sure any sawdust is off of the plywood side. Standing up 1/8″ drill bits in the predrilled screw holes at the corners allowed me to lower the two pieces onto each other while staying aligned. It’s not coming apart, so best not to rush the last step!
Image Gallery:

Final Thoughts:
I would be interested in a future project where an anodized aluminum panel is milled on a CNC and perhaps paint filled. This would produce a more durable surface compared to the plastic and be thinner, likely without the need for a plywood backer.
The tape hold down did really well and I would use it again, although patience has to be shown when removing the material off the tape. I could easily see pulling too hard and snapping or bending a freshly cut part. I’ll continue experimenting with other hold down methods…